Education
Maker Lessons
DIY Lava Lamp
During Fall 2020, COVID-19 was in full effect and it seemed as if everything was shut down. Due to this, I signed up to help the UT Chemistry Outreach team in the Department of Chemistry to create short, engaging lessons that young students can watch to learn more about chemistry. Our goal was to quickly develop lessons that we could post on social media every other week. We also thought that these videos would be a great way to engage the local community with the Department of Chemistry initiatives.
The lesson was developed with other UT Chemistry Outreach students. The team met up and decided multiple lessons that can be implemented virtually through social media. I was in charge of the DIY lava lamp lesson with some other students. We came up with a script, bought the material and filmed the lesson together. My partner did a voice over and I grouped the two together with the help of iMovie. We then sent the video to another set of students to promote the video and post it on social media.
The DIY lava lamps lesson was implemented in a virtual space. This video was made during Fall 2020, so in person events were halted due to COVID. The UT Chemistry outreach team thought that making short and engaging videos to post on various social media platforms would engage young kids and promote science at the same time.
I think overall the lesson went really well. The lesson was intended to be very short. Since the lesson was supposed to be implemented on social media, time was the biggest constraint. Even with the short time, I think a lot of science information was embedded throughout the lesson as well as the experiment was engaging. The backdrop used for the virtual lesson was very minimalist and clean which gave a clean and minimalist feel. It also contrasted well with the experiment being performed. The video was very easy to follow and was not too fast.
If I were to remake this lesson, I would try to implement different camera angles. I think this would make the video more interesting and active as it allows students to view the experiment in different ways. The experiment was filmed in a way that you can see almost the whole person. Since we implemented a voice over, you don’t need to see the person doing the experiment talking. For next time, I would only focus on filming just the hands.
Lesson: https://docs.google.com/document/d/1EK5ZIZpklUrb0cvDTXoCFQlLqA1QA15zI4UY8yU7Fis/edit?usp=sharing
Video: https://youtu.be/kUbU6D13hEM


Ann Richards Makerspace 6th Grade Tool Training
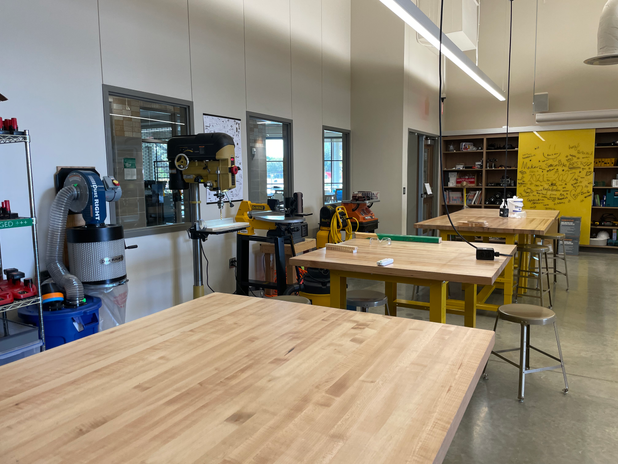
During Fall 2021, I was an intern at the Ann Richards School for Young Women Leaders makerspace. Through my time there I helped in a variety of projects. Many times, the teacher had a lesson already planned out and I would help in any way that I could. Since I was present during the whole time the 6th graders were working on their animal enrichment project, I was able to help plan from the very beginning.
Every year, Ann Richards partners with the Austin Zoo to help build enrichments for the animals. The animals in the Austin Zoo are all rescue animals, so providing them engaging toys or feeding spaces keeps them active. A group of 4-5 girls are partnered with an animal and start researching more about the animal and its behavior. After planning an enrichment for the animals, students budget their project and then build it. In order to start building, they have to get training in order to use all the machines. I was able to work with the 6th grade STEM teacher and makerspace teacher to help plan this training.
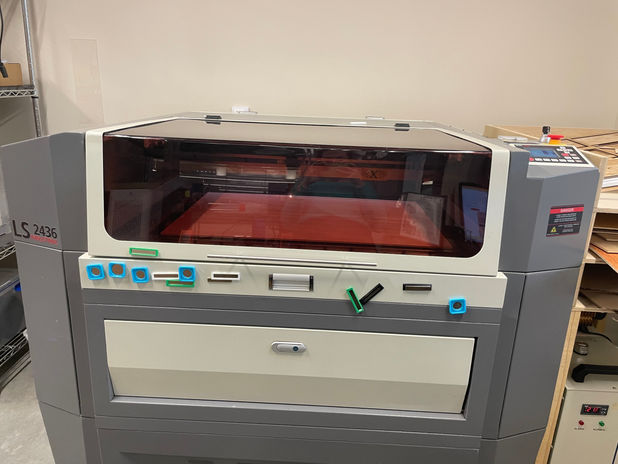
The teachers and I first thought of the machines and tools that students will most likely be using when building their engagement. Our final list consisted of the chop saw, band saw, drill, impact driver, drill press, laser cutter, 3D printer, and more simple tools such as screwdrivers and utility knife. Three class periods (an hour and a half each) were spent on tool training.
During the first two days, the class was split into three groups. Each teacher was assigned a different tool and students switched between groups. During the first day, I was in charge of teaching students how to safely use the band saw and chop saw on the second day. I made sure that every student got to practice with each type of saw with adult supervision. I taught students the importance of ear and eye protection while using these machines as well as why it is crucial to always have an adult watch them while they use these machines.
On the third day, we gave students an opportunity to work with their group mates to build something using at least 3 of the machines. It was amazing seeing what creative things the student built. Some examples include tic-tac-toe boards, lizard houses, bird houses, and jewelry boxes.
Although the tool training was a type of informal lesson, it was crucial to implement before the students started using the machines to build their enrichment project. Overall, I think the lesson went really well. I think splitting the class into three groups was a great idea. Doing so allowed the teachers to have a smaller group of students to teach and allowed them to focus on any questions or concerns that students had when using the machines. I also think that allowing students to apply their new knowledge to building something with their group mates was a fantastic idea.
During the two days of tool training with teachers, many times each station felt very rushed. Each class is an hour and a half and by the time the students come in, settle down, and do the question warm up, 20 minutes are lost. Students had to rotate between three teachers, so that left around 20 minutes per station. I felt that it wasn’t enough time to teach the students how to safely use the tools as well as let each student comfortably use the tools. Since this was the first time many of the students used these machines, they were not comfortable using them after practicing only once.
Maker resources for classroom teachers
Below are some maker resources that I have found helping in my maker journey that might help other teachers as well.
Thingiverse
Website: https://www.thingiverse.com/
Description: Thingiverse is a design community where anyone can discover, share and make 3D printable objects. It is a good resource for educators and students to find designs and share their own creations.
Makercase
Website: https://en.makercase.com/#/
Description: Many times I have found myself wanting to print out boxes for various things and this is my go to site. It's easy to use and has templates for different types of boxes to laser cut
Tinkercad
Website: https://www.tinkercad.com/
Description: A fantastic 3D online modeling program to create anything students have imagined. This free program is easy to use and a great way for students to start visualizing objects in 3D.
Makezine
Website: https://makezine.com/
Description: A maker magazine in order to get more information, resources, and projects in regard to making. Continuous posts and ideas are being published of upcoming classes and events.
Maker Ed
Website: https://resources.makered.org/
Description: An online library full of resources on project ideas, assessment tools, makerspace design tips, and professional development tools.
Maker education reflection with a focus on equity, diversity, and access
My experience creating formal and informal maker lessons has reinforced my desire for integrating making into education. I have personally experienced how much students learn when using their hands. More specifically, I have noticed that students can learn very well in the classroom, but by integrating making into projects and lessons, students learn how to apply their knowledge into something tangible. I think that learning this skill early on, helps students reinforce their knowledge, but also gain the confidence they need to be successful in college and onwards.
All of this has reaffirmed my belief that making programs are essential, especially in districts where students do not have as many resources to succeed. Material and tools should be affordable for all school districts and teachers need to get trained to help integrate making in their lessons as often as possible. We have seen with time that complex tools such as the 3D printer and laser cutter have become more affordable, but that is not enough. Ideally, simplified versions of these machines need to be created, so every student can use them before they graduate from high school. Not only will these newly learned skills help students stimulate their brain in a different way, but it might also encourage them to pursue a career in technology, making, or engineering.
Diversity should be one of the cornerstones of making. Every student brings their own unique ideas to the table and when students are put together, a magnificent product is created. Many times, when we think of engineers we think of males. Having the opportunity to intern at an all girls maker space has shown me that everyone is capable. Many times, girls shy away from wood working machines, electronics, or anything relating to making because it’s what the boys do. That is what happened to me growing up. Encouraging all students, especially girls, that making is for all and they are just as capable, can boost their self esteem and confidence. I have loved seeing little 6th grade girls use the chop saw and band saw to cut pieces of wood taller than them and every time they do, they have a huge smile on their face.


