Project
Below you will find the various projects that I worked on throughout my maker journey. Click on the projects below to learn more about the project.
Cable Holder
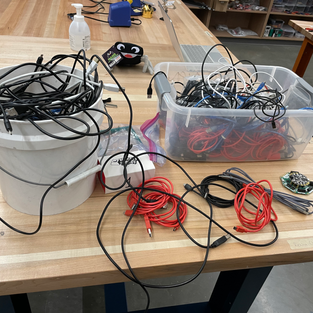
During my time as a maker intern at the Ann Richards makerspace, I noticed that there was a box of unorganized wires. Since the new Ann Richards school had just opened up earlier that year, there was a lot of organization that still needed to be done. I decided to help organize these wires.
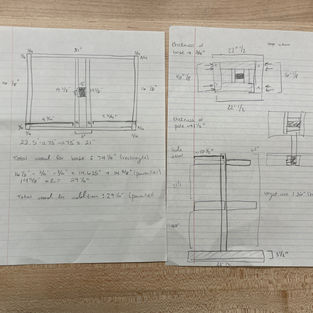
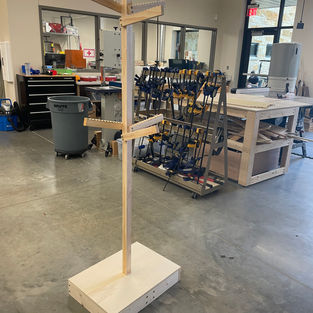
I first decided to talk to Mr. Oren to see where there was space to create something to organize these wires. Some things I took in consideration when designing my object was accessibility to students (6-12 grade students), easy organization, and size. After consulting Mr. Oren, I decided to make a cable holder that looked like a coat rack. I designed my project and got everything approved before starting it.
I first started making the notches that would hold the wires. I cut pieces of a 2 x 1 inch wood into 10 ½ inch with the chop saw. I then clamped two pieces together and used the drill press to drill holes between these two pieces. This allowed me to easily cut semi circles where the wires would hang without slipping. I quickly noticed that the drill press ripped part of the wood when I was drilling it. In order to prevent this, I decided to add more clamps and make sure that the wood would not move when I would drill it. Although this was a little difficult managing to put the clamps in a way that would not interfere with me or the drill, I figured it out and made indents on all the pieces.
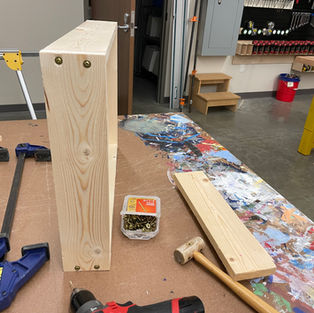
I then went on to make the base of this cable holder. I cut 2 x 4 inch wood into the desired length and then screwed them together to make a box out of them. I then had to add support beams for the long pole that will hold the cables. I also decided to make a cover for the base. I cut a thin piece of wood to the desired length with the table saw and then cut a hole in the middle of it in order to fit the middle pole through it.
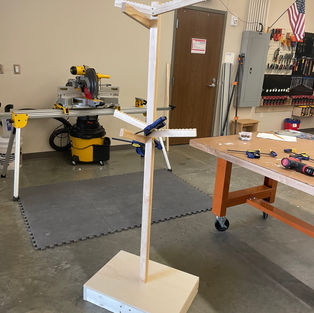
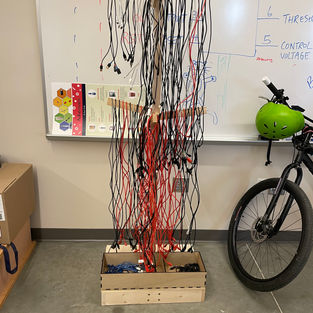
After the base was successfully made, I clamped the wood pieces with dents I made on the long pole to determine the ideal position for them. I found the position I liked and then screwed them on with a drill. After everything was made I put the cables on it and looked at the beautiful cable holder I made!
When I was organizing the cables, I noticed that there were some very small ones that would not fit on the dents. I decided to laser cut a couple of boxes using the website makercase.com to hold these small wires. Everything turned out fabulous and after a semester after making it, everything is still organized and sturdy!
Laser Cut Project
When I started interning in the Ann Richards makerspace, I was required to learn how to use all the machines, so I could teach and help all the students using them. One of these machines was the laser cutter. I have never used this machine, so I decided to make a little project when trying to figure out how to use it.
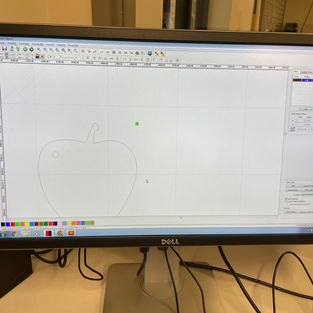
I decided to cut an apple keychain out of acrylic. I first found an image of an apple I liked and then edited it on Adobe Illustrator. I opened this edited image on the laser cutter software, BOSSLASER, and changed the power and speed setting to accommodate the material being used. I then downloaded the image to the laser cutter and watched the machine work.
The apple I made was really cute, but it was too big to be a key chain. I now use it as a cute decoration in my apartment and a great way to remember the skills I learned during my internship!
Jeans with Patches
For the past couple of years I wanted to somehow modify jeans. I never quite knew what I wanted to do, but I knew that my apartment in Austin did not have all the material and space I needed. I had a pair of jeans with fabric worn out between the legs, so on a summer day, I decided that it was the perfect day to get crafty.
The reason I chose this pair of jeans is because I really liked them. I wore them extremely often, so giving them a new life would give me more time to wear them. I knew I had to cover up the hole somehow, so I thought that adding fun patches to them would be great. I found fabric scraps that we had at home and cut various shapes in them. At first I thought that gluing the fabric with fabric glue would be the fastest way to get the job done. I quickly realized after putting my patched jeans on that it was not a good idea. The jeans became very stiff where the patches were and not stretchy. After carefully pulling the patches off, I got some string to match the patches and manually sewed the patches on. Since I already had the string on, I also decided to use the string to make a couple of shapes on the jeans.
The jeans turned out great! I gave them new life and wore them a couple of times ever since.
Microbit Challenge
During the Spring 2021 semester, UTeach partnered with Science Sprints within the College of Natural Sciences at UT Austin to create a science sprint that integrates making for them to implement. Science Sprints are usually one day long events that bring a group of students together to work towards a goal. Many times, sprints are created surrounding a real-world problem.
This challenge was done in our maker team which consisted of a mentor and 3-4 other makers. In our monthly cohort meetings during the semester we were given a micro:bit. In one meeting we worked with our group to familiarize ourselves with the microbit. The following meeting, we were introduced to the science sprint challenge.
The science sprint challenge consisted of using the microbit to create an activity that students can work on in groups to create something. Our team decided that the purpose of our sprint should be for students to work together, indirectly integrate diversity and varied perspectives, and connect making to a larger social context. After brainstorming and reflecting, we decided to create a game that is intended to be a cross-group activity. Each group receives one (or more) clue and has to work together to complete the puzzle. The puzzle includes blinking lights that represent the Morse code for each unique letter of a word. The groups must piece together the letters to find the answer.
Different group members worked together to create a circuit that would be compatible with our goal as well as figure out how to create morse code using little light bulbs. At first, we were only using one light bulb. Although we could have possibly made this work, it was hard to determine when the morse letter was being repeated. In order to solve this, we added another light bulb in a different color. By using another light bulb, we were able to turn that light bulb on to indicate that the code is about to be shown. Adding the second light simplified all the problems we were having.
After we decided to add two lights, we had trouble figuring out how to use the lights to symbolize the dots and dashes used in morse code. After spending a while playing around with the microbit, we decided that the dashes would be represented by the light turning on for 2 seconds and the dots to be represented by the light turning on for 1 second. We also integrated a 500 ms pause between each dash and dot.
After a lot of trial and error, we were able to make a great science sprint. The final product can be seen below.


